 Muvloom
User guideCanvas
Contents
Chapter 03
Canvas
Arrange, annotate, edit and export images on an infinite canvas.
The canvas is a workspace you can pan and zoom freely. Arrange several images together, annotate where changes are needed, and each new result is placed beside its source for easy comparison.
Create and open a canvas
- On the home page, switch to Canvas, describe your request and click Start creating. A new canvas project opens and the AI agent takes over.
- In the sidebar, click + next to Canvases to create a canvas, or All to see every project.
- Recent canvases are listed in the sidebar; click ↗ (Open immersive) to open one with the sidebar collapsed.
- Click Send to canvas on a work card to add the image to the current canvas.
Canvases save automatically and sync to the cloud once you are signed in.
Basics
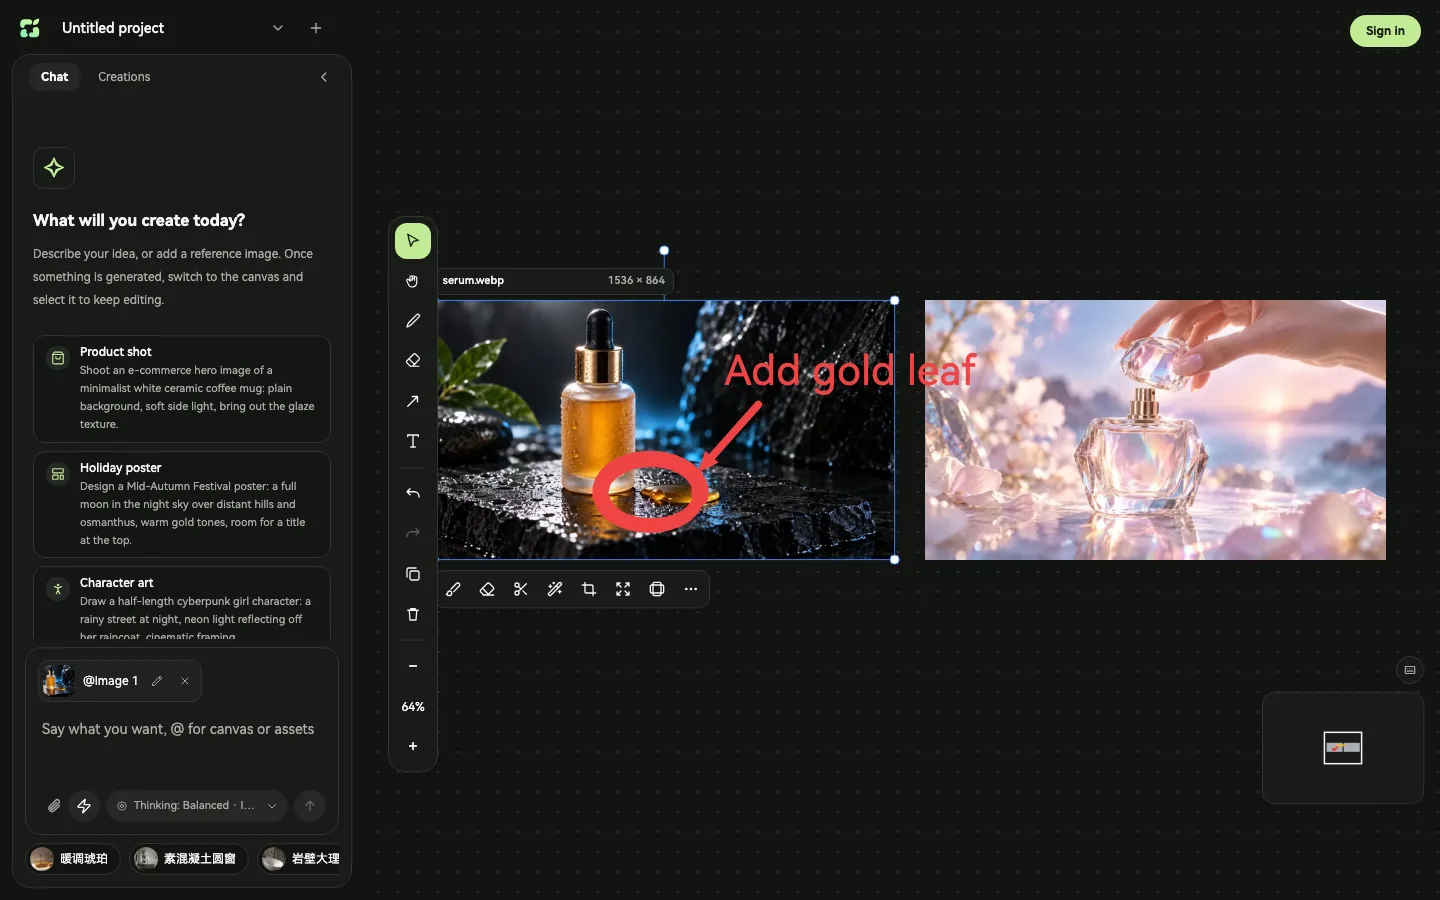
- 1Chat panel: talk to the AI agent; Creations lists everything on the canvas.
- 2Agent input: describe your request; use
@to reference canvas images or assets. - 3Toolbar: select, hand, pen, eraser, arrow and text, plus undo, redo and zoom.
- 4Annotations: mark what to change and how, with the pen, arrows and text.
- 5Image toolbar: shown when a single image is selected; provides inpainting, erase, cut-out and more.
Add images with + Import reference images on an empty canvas, by dragging files in, or by pasting. Scroll to pan; Ctrl / ⌘ + scroll to zoom.
| Action | Shortcut |
|---|---|
| Select / Hand | V / H |
| Pen / Eraser | D / E |
| Arrow / Text | A / T |
| Undo / Redo | ⌘Z / ⌘⇧Z |
| Copy / Paste / Duplicate | ⌘C / ⌘V / ⌘D |
| Select all / Add to selection | ⌘A / Shift + click |
| Delete | Delete |
| Temporary pan | Hold Space and drag |
| Drag without snapping | Hold ⌥ while dragging |
| Deselect | Esc |
Annotate changes
Annotations let you point to exactly where and what to change.
- 1Press D for the pen and circle the area to change.
- 2Press A to add an arrow and T to add a note, such as “add gold leaf”.
- 3Press V to return to the select tool and select the image; annotations on top of it are included automatically.
- 4Describe the change in the chat panel. The new result is placed to the right of the original.
Use the style panel in the top-right corner to change annotation color, stroke width and font size.
Image editing
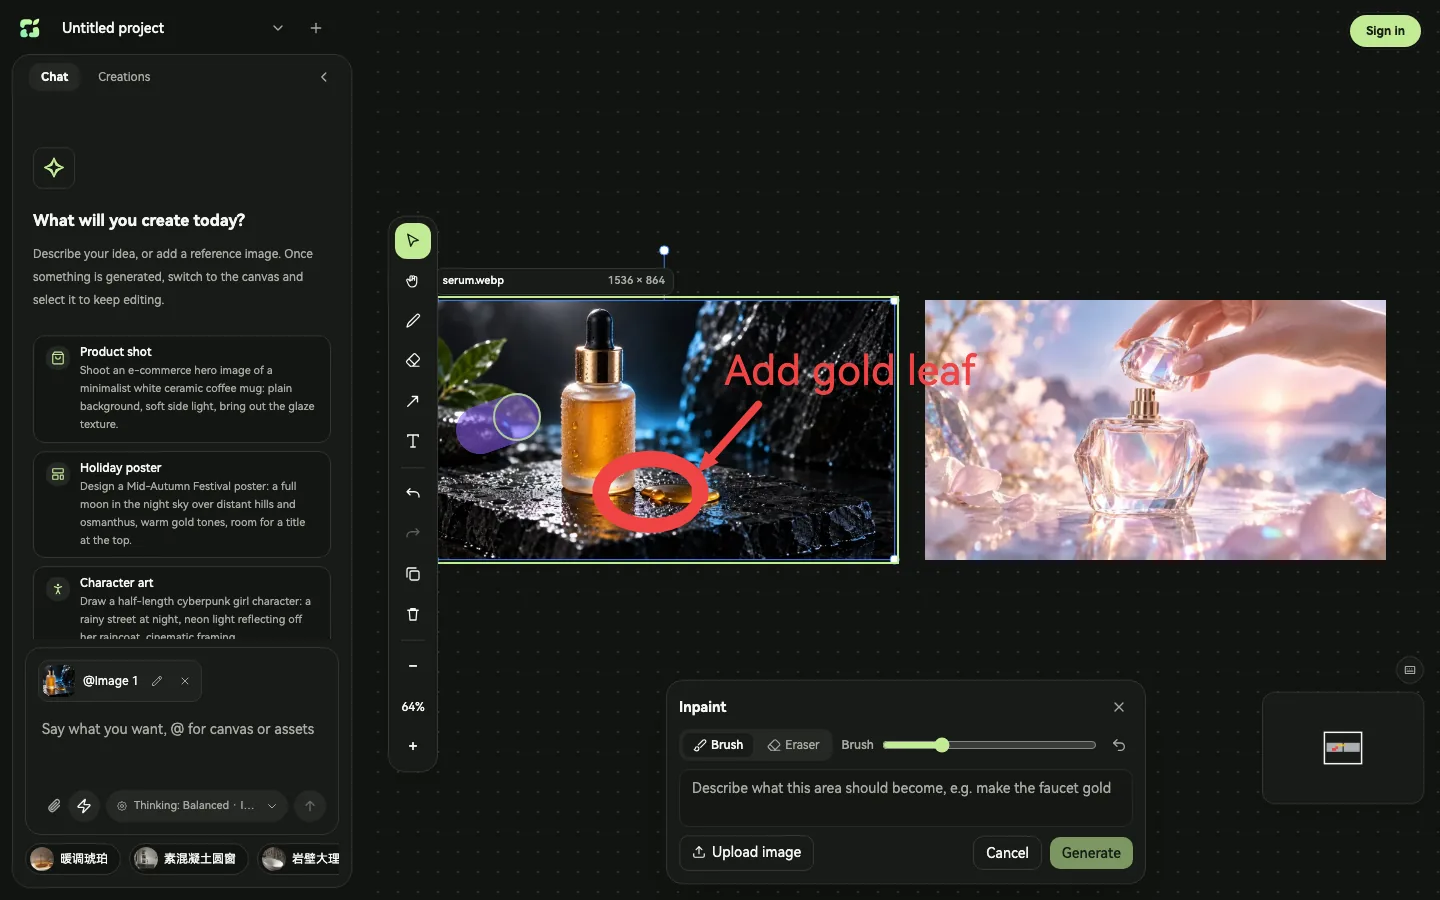
Selecting a single image shows the image toolbar:
| Tool | Description |
|---|---|
| Inpaint | Paint an area and describe the change; only that area is regenerated. |
| Erase | Paint over content to remove; the background is filled in automatically. |
| Cut out | Remove the background and export a transparent PNG. |
| Regenerate | Generate again with the same settings. |
| Crop | Drag the frame to crop. Runs locally and uses no credits. |
| Expand | Drag the frame outward to extend the image; optionally describe the new area. |
| More | View original, copy, download and delete. |
Batch actions and export
- Drag a selection box or Shift-click multiple elements to show the batch bar.
- Batch generate N: apply one description to every selected image, with each result placed beside its source. Useful for bringing a product set into one style.
- Export N: a single item downloads directly; multiple items are packaged as a ZIP.
- Right-click an image and choose Download image to download the original.