 Muvloom
User guideThe Create page
Contents
Chapter 02
The Create page
Prompts, reference images, batch generation, parameters and inpainting.
The Create page is for generating images directly. This chapter covers every feature of the prompt box.
Writing prompts
A prompt describes the image you want. A reliable structure is:
Image type + subject + setting + style + lighting and color + composition and ratio + on-image text
E-commerce hero image for a new rose serum, a clear glass bottle with a gold cap centered in frame, surrounded by rose petals and water droplets, refined texture, pink and rose gold palette, soft studio lighting, headline text “GLOW SERUM”
- Be specific: “a ginger short-haired cat sunbathing on a windowsill” gets closer to what you want than “a cat”.
- Quote on-image text: text that must appear in the image is rendered more accurately in quotes.
- Describe the style: use concrete traits such as “minimal, generous white space, low saturation” rather than brand names.
- Avoid conflicts: for example, asking for both “minimal” and “richly detailed”.
Reference images
Reference images keep a product, a person or a layout consistent across generations. Add them in any of these ways:
- Click the image button at the bottom left of the prompt box and choose files (multiple selection supported).
- Copy an image and paste it into the prompt box with Ctrl / ⌘ + V.
- Drag image files anywhere onto the page.
Type @ in the prompt to reference an image, which inserts a mention such as @Image 1 — for example, “place the cup from @Image 1 on the table in @Image 2”. The @ menu also lists your saved assets; choosing one adds all of its views.
Drag thumbnails to reorder them. Right-click a thumbnail to Insert reference or Save as asset.
Batch generation
Slots produce several variations in one submission, useful for comparing colors, styles or settings.
- 1Define a slot with
{name}in the prompt, for example “a {color} cat sitting in a {place}”. Names cannot contain spaces. - 2Click the slot chip and enter one value per line, for example “ginger”, “black”, “white”.
- 3Click Generate. Each combination is generated once, and the button shows the total, such as Generate 6 images.
Models and parameters
| Parameter | Description |
|---|---|
| Model | Models differ in style strengths and supported parameters; the default model suits most tasks. |
| Ratio / Size | Aspect ratio or exact resolution; see the next section. |
| Count | Images per run, 1–10. |
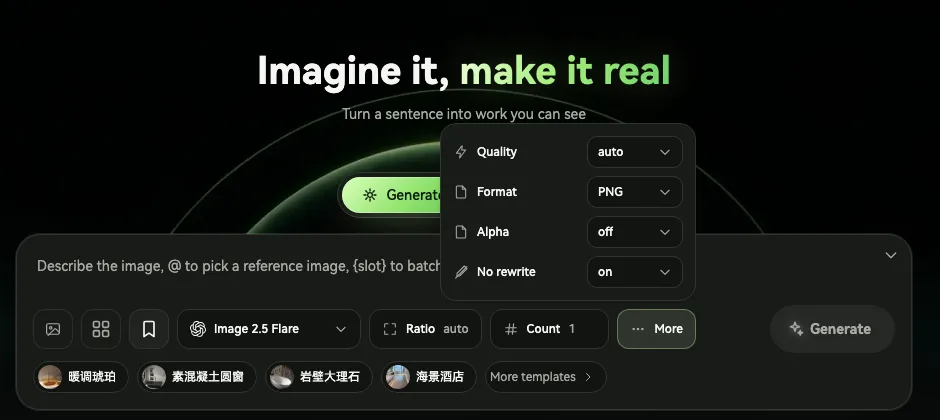
| Quality | auto / low / medium / high. Higher quality takes longer. |
| Format | PNG / JPEG / WebP. |
| Alpha | Available for PNG; generates a transparent background. |
| Compression | Available for JPEG and WebP; lower values produce smaller files. |
| No rewrite | On by default; prevents intermediate services from rewriting your prompt. |
Size and aspect ratio
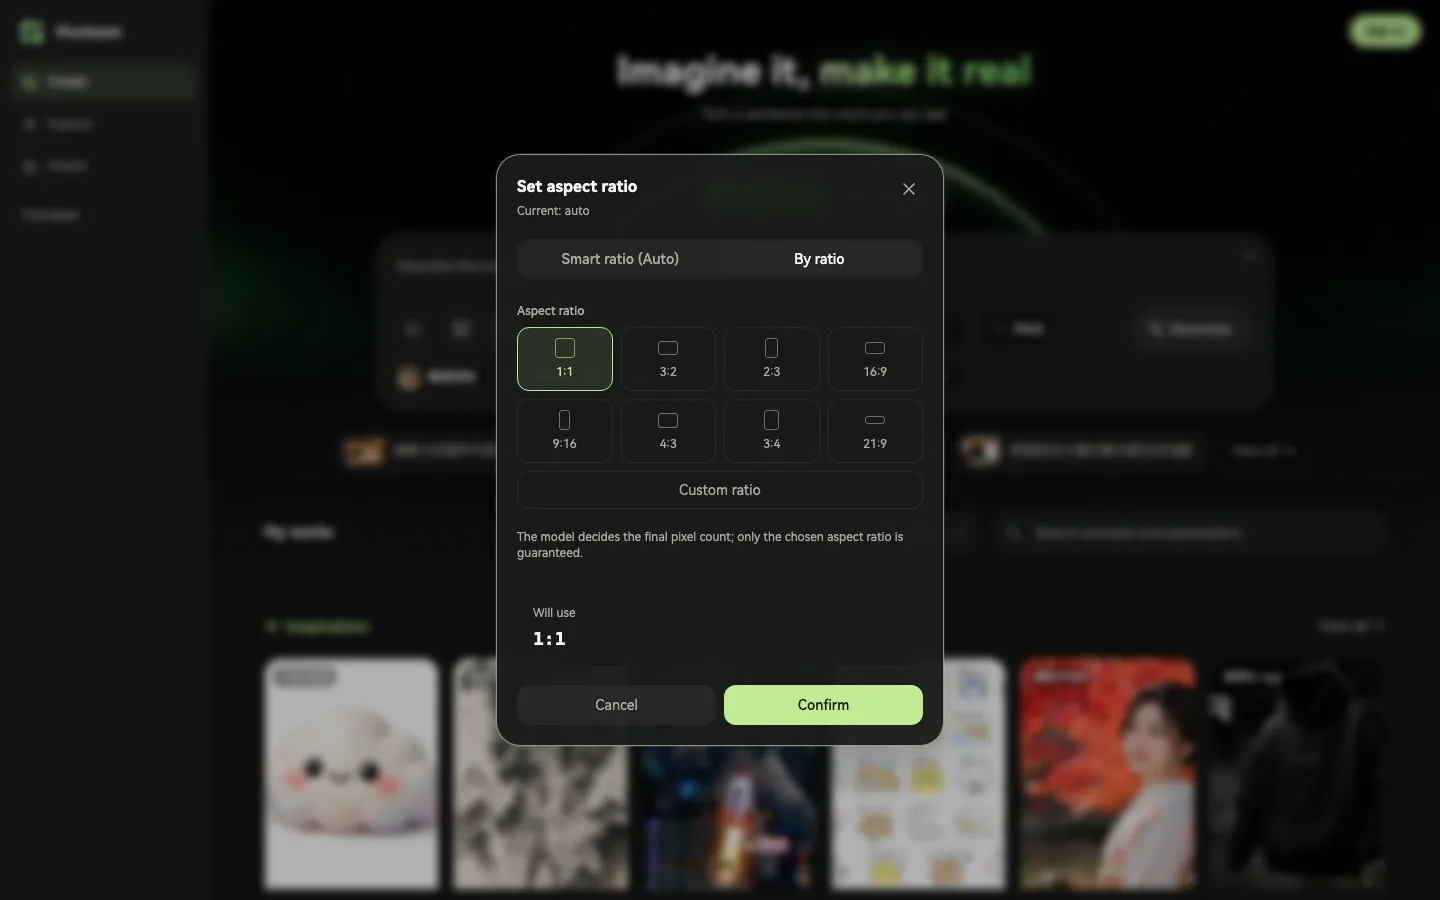
Click Ratio (or Size) to open the dialog. The available modes depend on the model:
- Smart ratio (Auto): the model chooses the size. Shown as Auto in size mode.
- By ratio: choose a common ratio such as 1:1, 3:4 or 16:9, or enter any value with Custom ratio. Models that support exact resolutions also offer a Base resolution of 1K, 2K or 4K.
- Custom size: enter width and height in pixels. Available only for models that support exact sizes.
| Use case | Recommended ratio |
|---|---|
| Product hero images, avatars | 1:1 |
| Social covers, posters, phone wallpapers | 3:4, 2:3, 9:16 |
| Article headers, web banners, video thumbnails | 16:9, 21:9 |
Inpainting
Inpainting changes only the area you paint, for tasks such as changing a color, removing an object or replacing an element.
- 1Click Edit output on a work card, click the brush icon on a reference thumbnail, or right-click an image and choose Edit.
- 2In the editor, outline an area with Lasso or brush it with Paint; use Erase to refine the selection. The blue overlay marks the area to change.
- 3Click Save. The image moves to the first reference slot with a MASK badge, and the submit button changes to Edit mask.
- 4Describe the change in the prompt, for example “replace the cup with a pink ceramic mug”, then click Edit mask.
Reusing prompts and templates
| Type | How to save | How to use |
|---|---|---|
| Saved prompt | Click the bookmark button Save as template in the prompt box; referenced assets and parameters are saved with it. | Type / in the prompt box, or apply it from Assets → Prompts. |
| Template | Create one under Assets → Templates, or use a built-in template. | Click a template below the prompt box to switch model and size, then attach product assets with @. |
Managing works
- Filter: use Favorites only, the status filter (Completed, Generating, Failed) or keyword search.
- Bulk actions: hold Ctrl / ⌘ and click cards, or drag a selection box over empty space; on mobile, swipe a card sideways. Selected works can be favorited, downloaded or deleted together.
- Failures: open the details to see the cause. If content review rejected the prompt, click Edit the prompt to revise it; otherwise click Retry task.
- Background processing: jobs on built-in models run on the server and resume automatically after you close or refresh the page.